
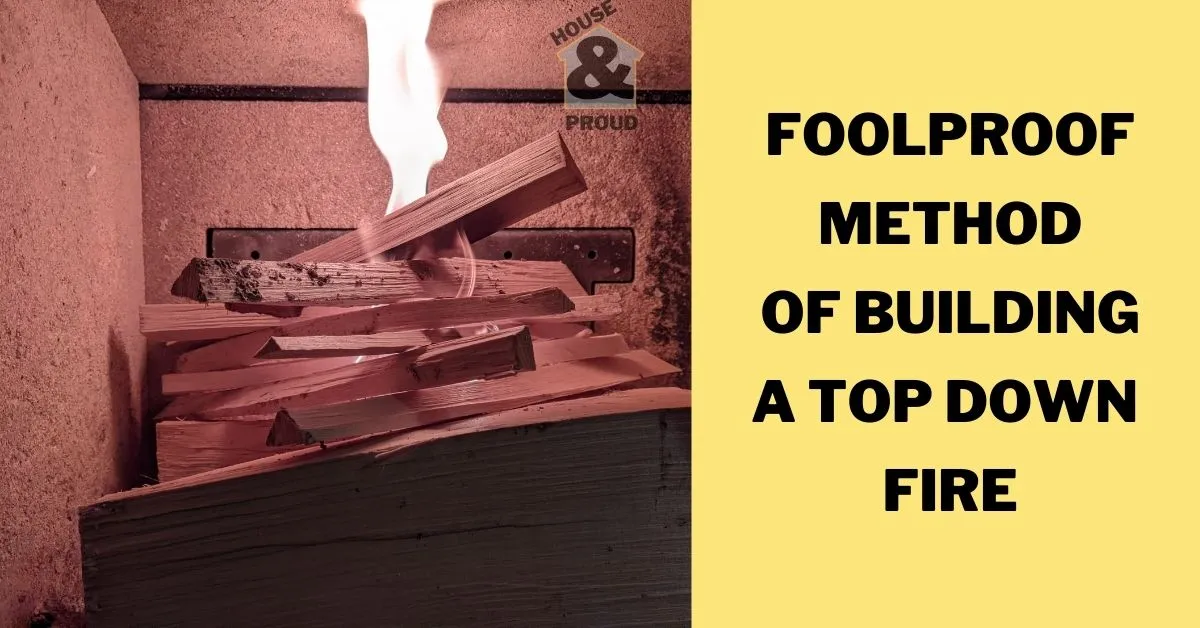

If you’re new to woodburning stoves, then you’ll probably have come across the traditional method of lighting a fire. But, what you may not have heard of is the top down, or upside down, fire lighting method. This way of lighting a fire is so much better, for so many reasons, but it can be a little tricky. In this quick guide, I’ll go through my foolproof method for how to light a top down fire in a wood burning stove.
The tips I provide are set out below, and I’m sharing them because, after lots of trial and error, I’ve come up with a method that works every single time.
What is a top down / upside down fire?
A top down fire is basically just a fire where you put your main source of fuel at the bottom of your fire build, and your kindling on top. In practice, this means you use your logs as a base for your kindling.
This is different from a “traditional” way of building a fire, where you would build a kindling tower and then put a log on top.
Now, most people stick with the traditional method as upside down fires are harder to get the hang of, but with a bit of practice you’ll never go back to other methods of fire lighting again!
Why top down fires are best for wood burning stoves
The biggest reason top down fires are so good in wood burning stoves is because this way of lighting a fire means that your flue gets instant heat. Because you’re not building a base of kindling with a log on top, there’s no barrier to the flames rising right up to the top of your stove. This means, within a matter of minutes your flue gets filled with warm air and is able to draw up fresh air right through your fire.
Not only does this help to get your fire burning quicker, but it also means a lot less smoke.
Basically, smoke is caused by incomplete combustion as you get most of it while your fire is starting off. If you just put a log on some burning kindling, then you’ll get a lot of smoke while the log starts to catch.
If you do the upside down method, your kindling is free to burn and your logs don’t smoke as much because flames aren’t catching on random bits and snuffing out.
Bottom line is that top down fires burn hotter and cleaner – this is especially important if you want to keep your wood burning stove glass clean, and your room smoke free.
Another benefit of building top down fires in a wood burning stove is the fact that they require a lot less minding after you light the fire. You don’t have to worry about putting on a log only to see it snuff out the kindling. And you won’t have logs becoming unbalanced from the kindling they’re resting on and falling into your stove glass.
How to build a top down fire in a wood burning stove
Hopefully it’s now clear why top down fires are the best type of fires for wood burning stoves. But, as mentioned, they do take a lot of practice to get right. Below are my tips for starting a top down fire, based on months of trial and error. Now, I can start an amazing, low effort fire with just one match. It’s awesome.
Step One: Get your log selection right
First things first, you’ll need to be using kiln dried wood (see my article on the best woods if you’re interested). This is important because the higher the moisture content in wood, the less effectively it will burn.
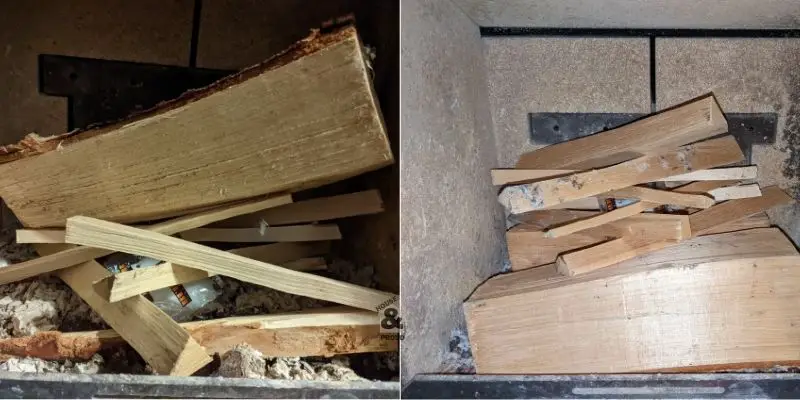
Assuming you’ve got wood with less that 20% moisture level, then select one or two logs that have a flat edge. They don’t have to be perfect here, they just need to be able to rest with the flat side facing up so that you have a stable base for your kindling.
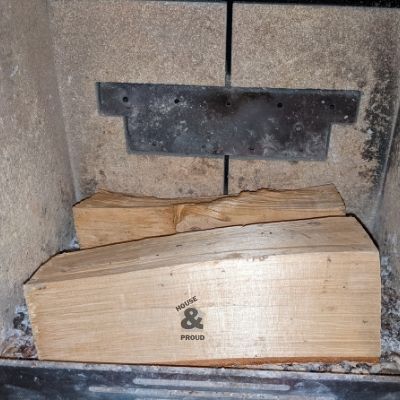
Now, get your flat-faced logs and put them at the base of your wood burning stove, as shown in the picture. Just make sure that if you’re using multiple logs as your base that you leave a little gap between them to help air flow.
Step Two: Place your fire lighter on the logs
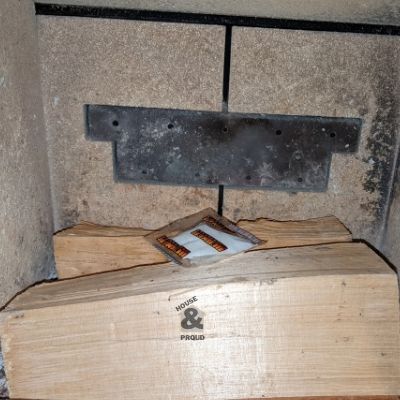
This one seems obvious if you just look at the picture, but loads of advice I saw online said that you should put the firelighter in the middle of the kindling, or multiple firelighters in different places.
You don’t need to do this at all. Just put your firelighter on top of your logs.
Also, don’t use lots of newspaper. I’ve fallen for that before, thinking it would help get the fire going, but all it ends up doing is creating a lot of fine ash that restricts air flow. You can obviously still get a fire going, but it’s not necessary if you’re using a quality firelighter.
Step Three: Build a kindling pyramid around and over your firelighter
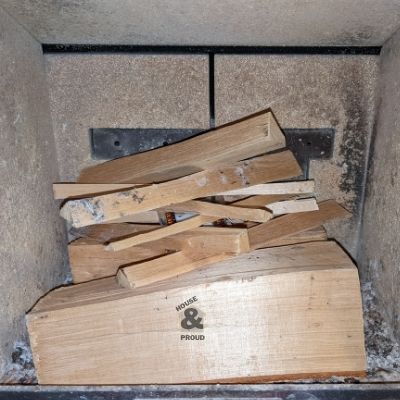
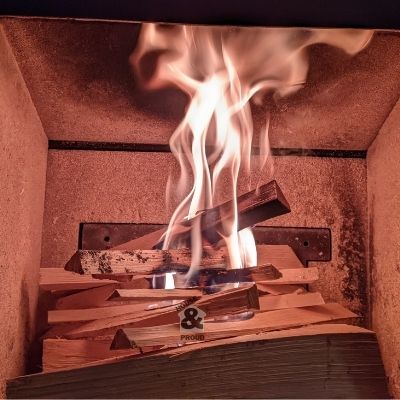
Just like the picture, build a kindling pyramid. Start by making a triangle around the firelighter, and then bring the walls of your “pyramid” up and over the firelighter.
Making sure that your kindling criss-crosses over the firelighter is really important here. It means that your starting flame will hit at least two or three strips of wood, which will allow the fire to spread faster.
Whatever you do, don’t try to build a “log cabin” stack of kindling. I’ve tried this so many times and it doesn’t work very well. This is because it pretty much just makes a chimney around the firelighter, so not a lot of the kindling catches and the fire takes ages to get going.
Step four: light the firelighter and control the oxygen levels
Ok, so I’m not going to point out how to actually light the firelighter. But once you’ve lit it, you’ll find yourself at the most critical step of the top down fire lighting method: oxygen control!
Now, traditional fires require a lot of air flow at the start, so if you’re like I was you’re going to be tempted to keep your wood burner door and air vents wide open while the fire gets going.
Obviously, this is still important to do for the first few minutes – you don’t want your fire to suffocate.
But, as soon as your kindling is lit and has a decent amount of flame going, it’s time to shut your woodburner door.
This is because, unlike traditional fires, your kindling in the top down method is already directly heating up the flue. Air is getting drawn up your chimney much quicker, which means new air is also getting drawn into your wood burner at a faster rate than you might be used to.
If you keep your door open for too long, then your kindling will burn out too quickly, and this won’t give your base logs enough fuel to start them off.
Step five: Watch the magic of the top down fire method in action
Once you’ve completed the other steps, that’s pretty much it! Because you can start a top down fire with a couple of big logs right at the start, you don’t need to worry about progressively building up the logs in the fire.
Instead, you can sit back and enjoy.
If you do it right (and, trust me, it takes a few tries) then your fire will be up to temperature in about 10-15 minutes, and you’ll have a really good burn going on.
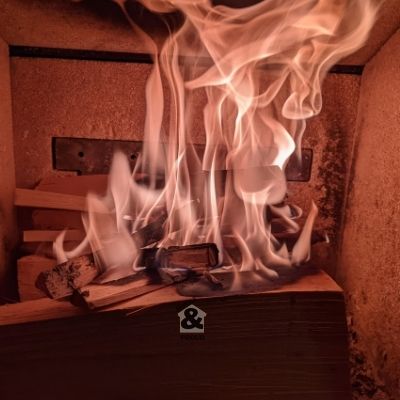
Not only that, you’ll find that any new logs you add to the fire will instantly catch because the starter logs create a really good ember bed across the whole base of your wood burning stove.
No more having to add a few extra bits of kindling mid way through your fire!
Troubleshooting: What if your upside down fire doesn’t work?
Like I said, I’ve gone through lots of trial and error with this method before it worked 100% for me.
So, here are a few extra tips if you find yourself struggling with your top down fire.
Double check your air flow routes
If you find that your kindling lights well but your base logs don’t burn well, then it may be because there isn’t enough air flow around the logs.
This happened to me whenever I used logs that were too “cuboid” in shape – they basically sat flat on the stove floor, so air didn’t circulate around them.
If that’s happening to you, just lay your base logs on two strips of kindling – sorted.
Avoid using oak logs as your base
As I point out in my article about the best firewoods for wood burning stoves, oak is a good wood, but it isn’t a very good starter log. It takes a lot of heat for oak to catch, so I find it very hit and miss for using in the top down fire method.
Don’t over stuff your wood burning stove with newspaper
If you don’t use firelighters and rely on paper or cardboard, try not to use too much of it. I’ve made this mistake plenty of times, and I find that even though lots of paper creates a really satisfying initial burn, it quickly turns to ash and starts to clog up the gaps between your logs and restricts air flow.
Instead, just use enough to get the first few pieces of kindling lit. It will take longer for your fire to get up to temperature, but you avoid the risk of excess ash. See my article on how much ash to leave in your woodburning stove for more information.
Get rid of old ash from your stove base
While having a bed of ash is great when you do the traditional fire method (it helps to retain heat) – if you have too much ash in the top down method it can restrict air flow.
Because you don’t want to keep the door to your wood burner open for too long when starting your fire, it’s really important that the air that gets sucked into your stove can flow freely. A deep bed of ash (roughly anything more than an inch) can prevent this.
Summary: Top down fire method for wood burning stoves
I’ve just realised that I’ve gotten carried away a bit and written a pretty comprehensive guide to lighting a top down fire in a wood burning stove. If you’ve read to the end, then, like me, you’re probably a bit geeky when it comes to wood burning stoves! Like recognises like!
Thanks very much for reading, and please do check out my other articles on this topic.